MariaDB [10.6] 설치 및 기본 사용법
- ◈『DataBase』/MariaDB(Mysql)
- 2022. 3. 6.
◆ MariaDB
공식 홈페이지 : https://mariadb.com/
배포 사이트 : https://mariadb.org/
공식 로고 사용 시 : https://mariadb.com/ko/about-us/logos/
이제는 누구나 알고 있는 오픈 소스의 관계형 데이터베이스 관리 시스템입니다. MariaDB서버는 상업적 사용과 관계없이 GPLv2에 따라 라이선스가 부여된 무료 오픈 소스 소프트웨어로 사용 가능합니다. 원래는 MySQL를 만든 개발자이며, 오라클 업체에서 인수 및 상용화되고 나서부터는 MariaDB로 대체되고 있습니다. MariaDB는 핵심 개발자가 나와서 MySQL과 동일한 소스 코드를 기반으로 개발하였기 때문에 API와 명령어는 거의 동일합니다. 현재는 마리아 DB [10.X] 변경되어 새로운 기능이 추가되고 독립적인 오픈 소스 기반으로 운영되고 있습니다. [※ MariaDB는 Widenius의 작은 딸 Maria의 이름을 따서 명명되었습니다.]
[설치환경 및 준비물]
릴리즈 설치 테스트 : 2022-02-24
□ VMware Workstation 가상화에서 Rocky Linux 8.5 OS 준비 [포스팅 참고]
□ [root@localhost ~]# dnf update [※ OS 설치 후 기본 패키지 최신 업데이트]
□ [root@localhost ~]# cat /etc/selinux/config | grep SELINUX [보안 설정]
SELINUX=disabled [빠른 테스트를 위해 비활성화, 재시작 필요]
마리아[Maria DB] 설치
□ Rocky Linux 8 - AppStream 기본 미러 사이트에서는 10.3.X 버전으로 설치됩니다.
[root@localhost ~]# dnf install mariadb-server mariadb

□ 다른 버전을 설치하고 싶을 경우
버전별 세팅 방법[스크린샷 참고]
https://downloads.mariadb.org/mariadb/repositories/#mirror=yongbok
Rocky는 아직 없기 때문에 호환되는 CentOS/Redhat 패키지 설치 방법을 따라가면 됩니다.

| 버전 | 출시일(최초) | 최신버전 | 출시일 | 상태 | 수명 종료 |
| 10.3 | 2017년 4월 16일 | 10.3.34 | 2022-02-12 | 오래된 버전(GA) | 2023년 5월 |
| 10.6 | 2021년 4월 26일 | 10.6.7 | 2022-02-12 | 안정화 버전(GA) | 2026년 7월 |
| 10.7 | 2021년 9월 17일 | 10.7.3 | 2022-02-12 | 안정화 버전(GA) | 2023년 2월 |
| 10.8 | 2021년 12월 22일 | 10.8.2 | 2022-02-12 | 릴리스 후보(RC) | 미정 |
※ 서버를 새로 구축을 한다면 수명이 긴 [10.6] 버전으로 설치하는 게 가장 좋습니다.
먼저 YUM 저장소 생성[파일 생성 후 저장]
[root@localhost ~]# vi /etc/yum.repos.d/MariaDB.repo
# MariaDB 10.6 RedHat repository list - created UTC
# https://mariadb.org/download/
[mariadb]
name = MariaDB
baseurl = https://mirror.yongbok.net/mariadb/yum/10.6/rhel8-amd64
module_hotfixes=1
gpgkey=https://mirror.yongbok.net/mariadb/yum/RPM-GPG-KEY-MariaDB
gpgcheck=1
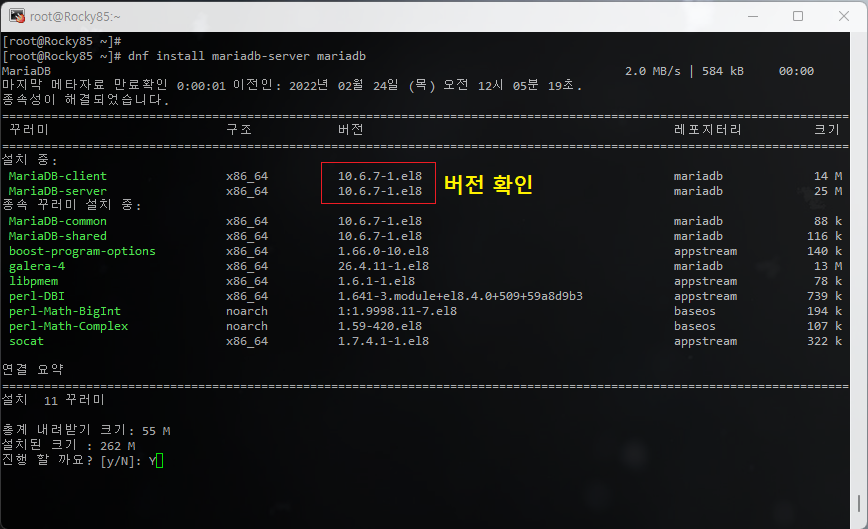
MariaDB 설치[10.6.X]
[root@localhost ~]# dnf install mariadb-server mariadb
다시 기본 버전으로 설치하고 싶다면 아래와 같이 제거 후에 재설치[10.3.X] 진행
[root@localhost ~]# dnf remove mariadb-server mariadb [10.6.X 제거]
[root@localhost ~]# rm -f /etc/yum.repos.d/MariaDB.repo [미러사이트 제거]
MariaDB 구동 및 기본설정
□ MariaDB 구동
[root@localhost ~]# systemctl start mariadb [서비스 시작]
[root@localhost ~]# systemctl enable mariadb [부팅 시 자동 시작 활성화]
Created symlink /etc/systemd/system/multi-user.target.wants/mariadb.service → /usr/lib/systemd/system/mariadb.service.
[root@localhost ~]# ps -ef |grep maria [프로세스 구동 확인]
mysql 43434 1 0 03:51 ? 00:00:00 /usr/sbin/mariadbd
□ MariaDB 기본 설정 [DB가 구동된 상태에서 진행 가능]
[root@localhost ~]# mariadb-secure-installation
※ 10.5 버전까지만 해도 mysql_secure_installation 명령어를 사용했던 것 같은데, 실행 스크립트 이름을 변경했네요.
In order to log into MariaDB to secure it, we'll need the current
password for the root user. If you've just installed MariaDB, and
haven't set the root password yet, you should just press enter here.
Enter current password for root (enter for none): [패스워드가 없기 때문에 엔터]
OK, successfully used password, moving on...
※ 이 부분은 버전에 따라 안 나올 수 있습니다.
Setting the root password or using the unix_socket ensures that nobody
can log into the MariaDB root user without the proper authorisation.
You already have your root account protected, so you can safely answer 'n'.
Switch to unix_socket authentication [Y/n] Y [MariaDB 실행 시 통신 소켓 생성 여부? Y 엔터]
Enabled successfully!
Reloading privilege tables..
... Success!
You already have your root account protected, so you can safely answer 'n'.
Change the root password? [Y/n] Y [DB ROOT 패스워드 설정할 것인가? Y 엔터]
New password: 패스워드 입력
Re-enter new password: 재확인 패스워드 입력
Password updated successfully!
Reloading privilege tables..
... Success!
By default, a MariaDB installation has an anonymous user, allowing anyone
to log into MariaDB without having to have a user account created for
them. This is intended only for testing, and to make the installation
go a bit smoother. You should remove them before moving into a
production environment.
Remove anonymous users? [Y/n] Y [익명의 접근을 막을 것인지? 보안을 위해 Y 엔터]
... Success!
Normally, root should only be allowed to connect from 'localhost'. This
ensures that someone cannot guess at the root password from the network.
Disallow root login remotely? [Y/n] Y [DB ROOT 원격을 막을 것인지? 보안을 위해 Y 엔터]
... Success!
By default, MariaDB comes with a database named 'test' that anyone can
access. This is also intended only for testing, and should be removed
before moving into a production environment.
Remove test database and access to it? [Y/n] Y
[Test 용으로 생성된 데이터베이스를 삭제할 것인가? Y 엔터]
- Dropping test database...
... Success!
- Removing privileges on test database...
... Success!
Reloading the privilege tables will ensure that all changes made so far
will take effect immediately.
Reload privilege tables now? [Y/n] Y [현재 설정한 값을 적용할 것인지? 당연히 Y 엔터]
... Success!
Cleaning up...
All done! If you've completed all of the above steps, your MariaDB
installation should now be secure.
Thanks for using MariaDB! [설정 완료]
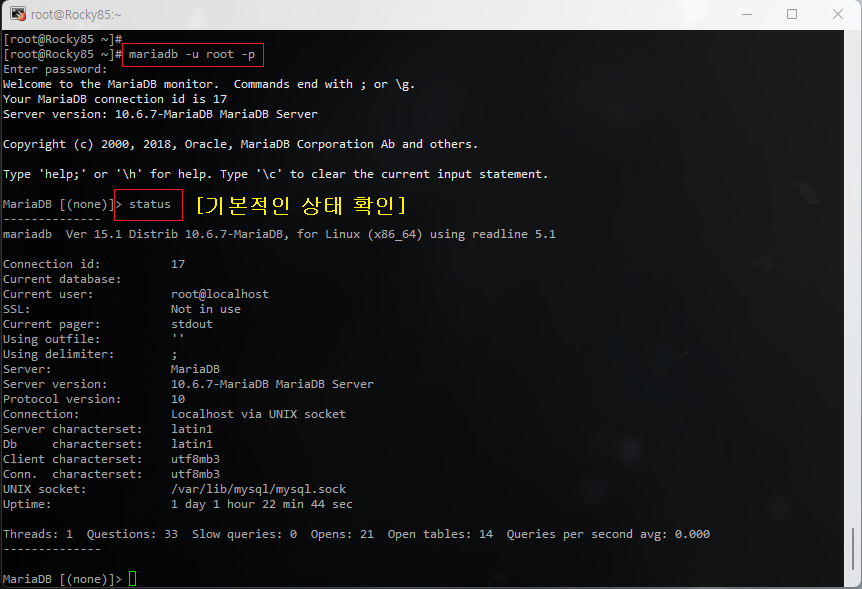
□ MariaDB 접속
[root@localhost ~]# mariadb -u root -p
※ 기존처럼 mysql -u root -p 해도 됩니다.
Enter password: 패스워드 입력
◇ MariaDB(Mysql) 환경설정을 관리하는 파일은 아래의 경로입니다.
[root@localhost ~]# cat /etc/my.cnf
!includedir /etc/my.cnf.d ▷ 인클루드(포함된 경로)
[root@localhost ~]# ls -al /etc/my.cnf.d/
drwxr-xr-x 2 root root 4096 3월 3 19:18 .
drwxr-xr-x. 112 root root 12288 3월 3 19:27 ..
-rw-r--r-- 1 root root 295 2월 10 15:17 client.cnf
-rw-r--r-- 1 root root 763 2월 10 15:17 enable_encryption.preset
-rw-r--r-- 1 root root 232 2월 10 15:17 mysql-clients.cnf
-rw-r--r-- 1 root root 1080 2월 10 15:17 server.cnf
-rw-r--r-- 1 root root 120 2월 10 15:17 spider.cnf
설정 파일을 열어보면 설정값이 없기 때문에 설치 시 기본 환경으로 돌아갑니다. 실제 서버 구축을 할 경우는 솔루션 환경에 맞게 DB 튜닝이 필요할 수 있습니다.
■ 기본 사용 방법(명령어)
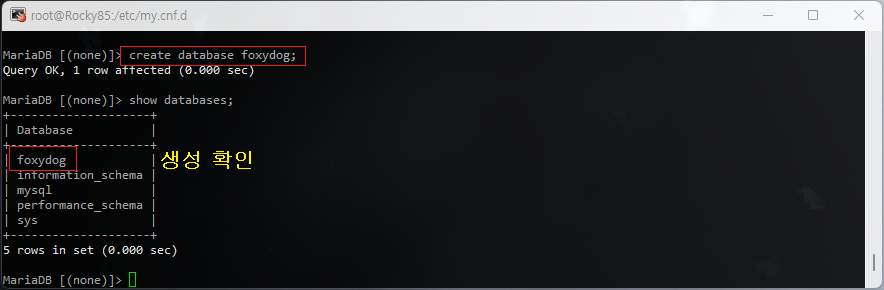
◇ 데이터베이스 목록 보기
MariaDB [(none)]> show databases;

◇ 데이터베이스 생성(기본 생성)
MariaDB [(none)]> create database DB명;
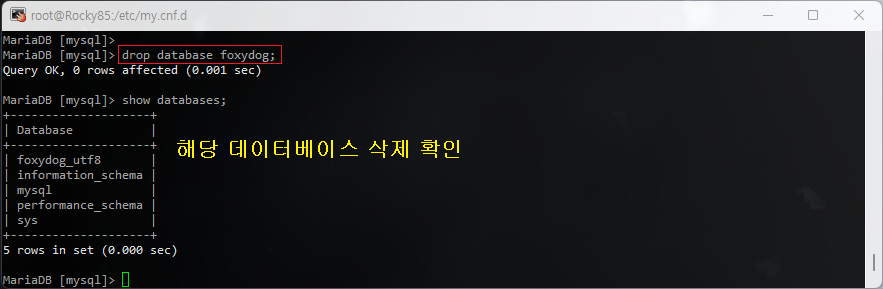
◇ 데이터베이스 삭제
MariaDB [(none)]> drop database DB명;
※ 데이터베이스 삭제는 내부의 테이블까지 전체를 지우므로 삭제 시 주의 또 주의!!
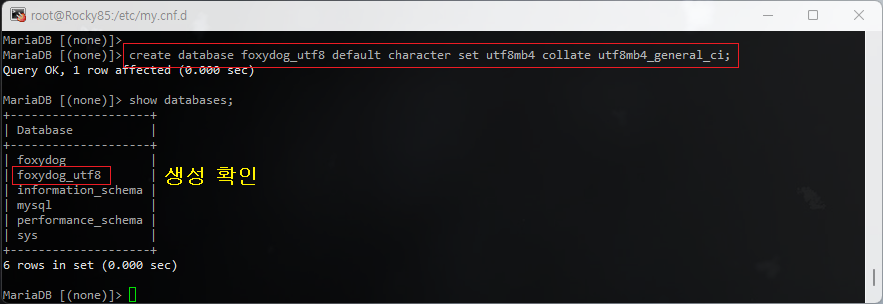
◇ 데이터베이스 생성(특정 캐릭터 셋 지정)
MariaDB [(none)]> create database DB명 default character set Charset collate Default collation;
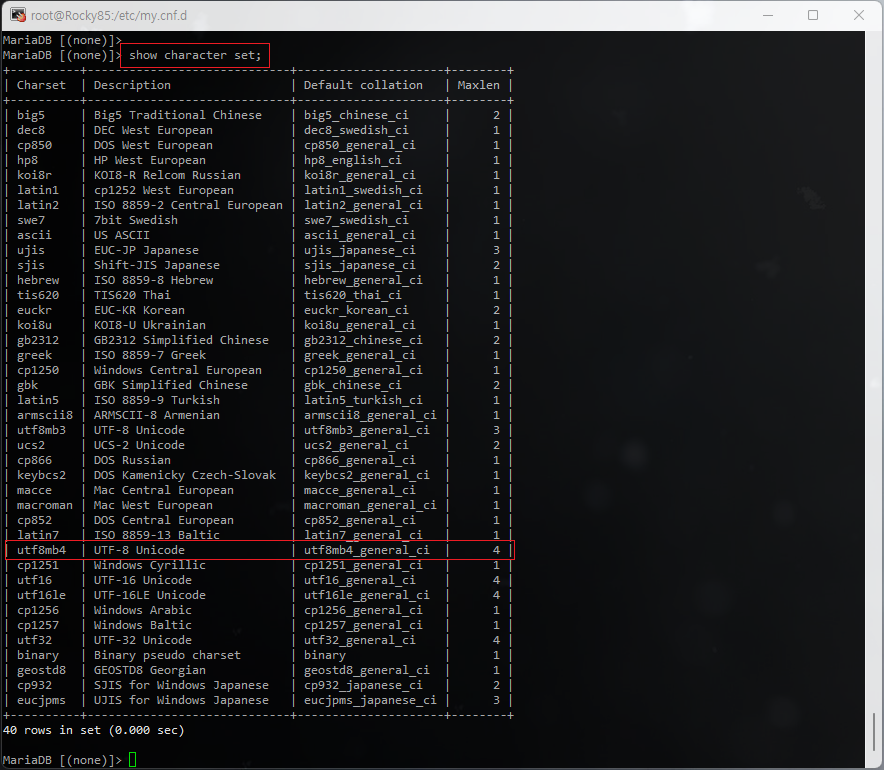
◇ 데이터베이스 생성 시 지원하는 캐릭터 셋(Character Set) 확인[상단 특정 캐릭터 셋 지정 시 참고]
MariaDB [(none)]> show character set;
※ 최신 세팅을 하실 경우는 되도록 모든 유니코드 문자를 표현할 수 있는 UTF8로 세팅하는 게 좋습니다. 최근에는 이모지(EMOJI) [예시:👍🌍🚙] 그림 같은 아이콘을 많이 사용하는 추세인데요. 이것을 처리할 수 있는 utf8mb4 캐릭터를 사용합니다.

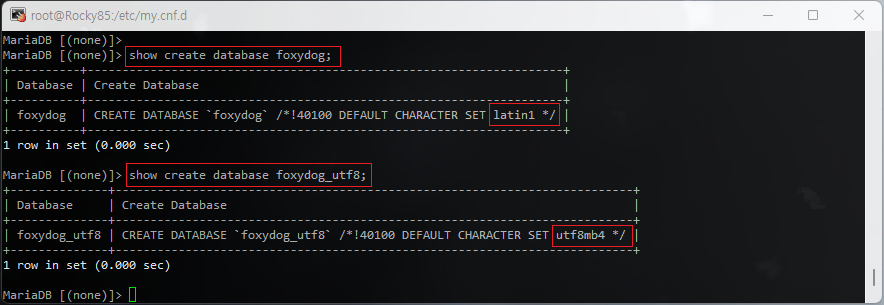
◇ 특정 데이터베이스 캐릭터 셋 확인
MariaDB [(none)]> show create database DB명;
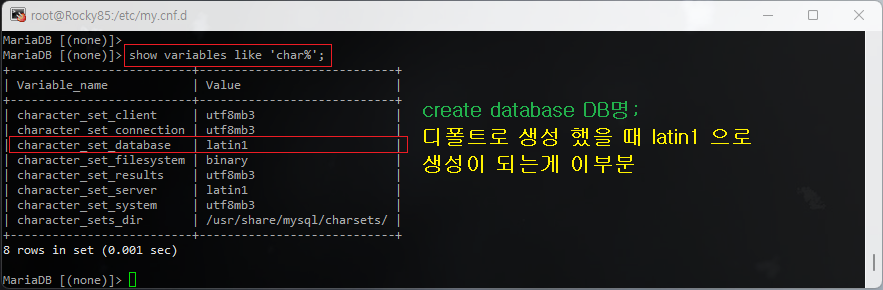
◇ MariaDB 캐릭터 셋 세팅 확인
MariaDB [(none)]> show variables like 'char%';
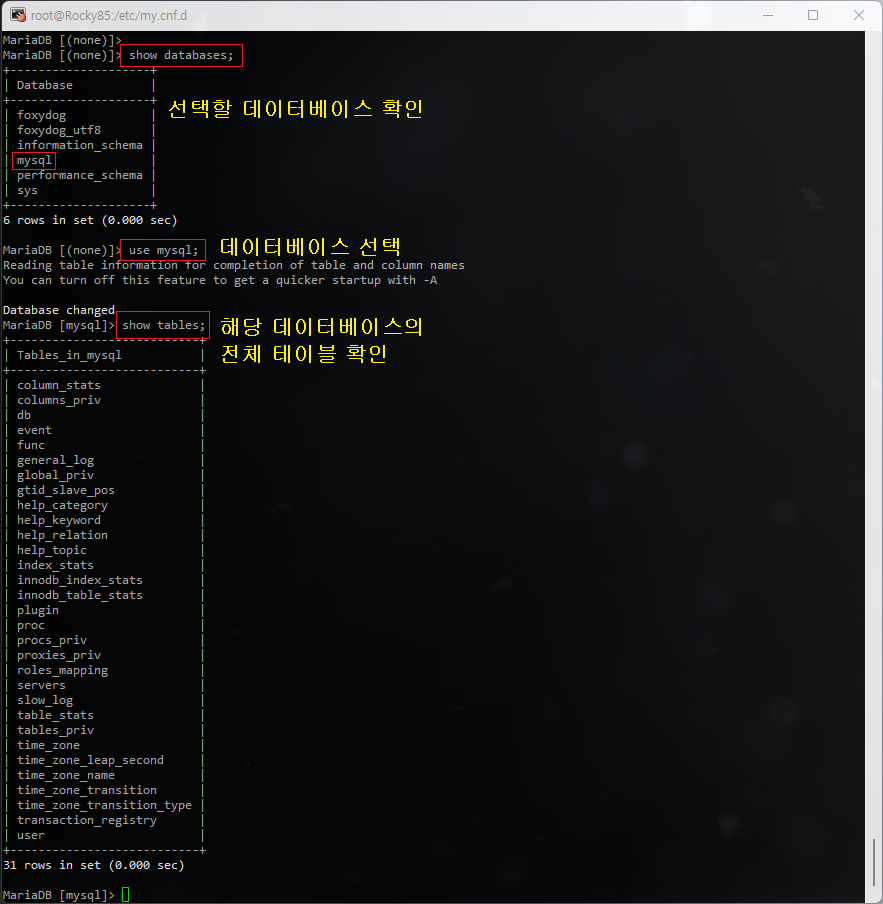
◇ 데이터베이스 선택 및 테이블 목록 확인
MariaDB [(none)]> use DB명;
MariaDB [(none)]> show tables;
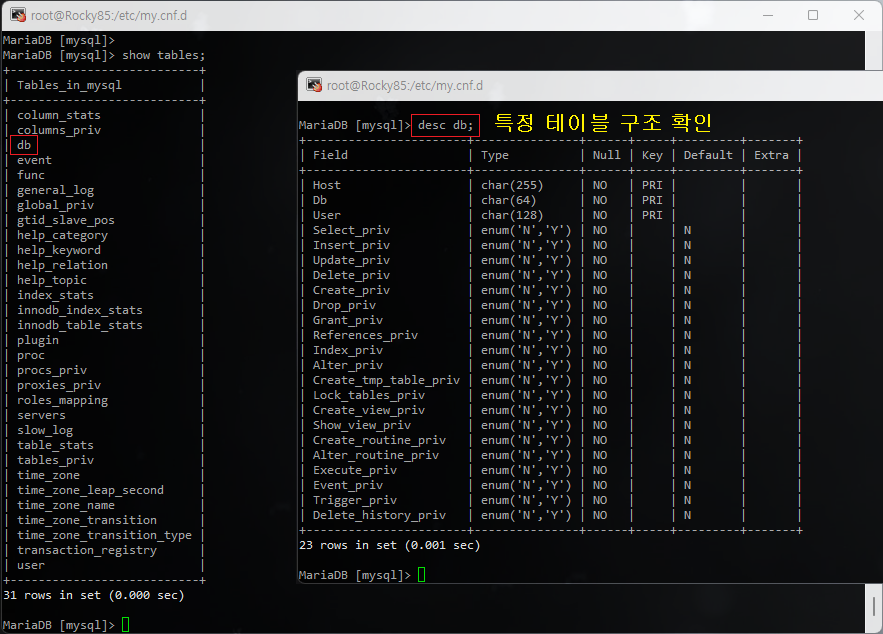
◇ 특정 테이블 구조 확인[결과 값은 같음, 편한 것을 사용]
MariaDB [(none)]> desc [describe] 테이블명;
MariaDB [(none)]> show columns from 테이블명;
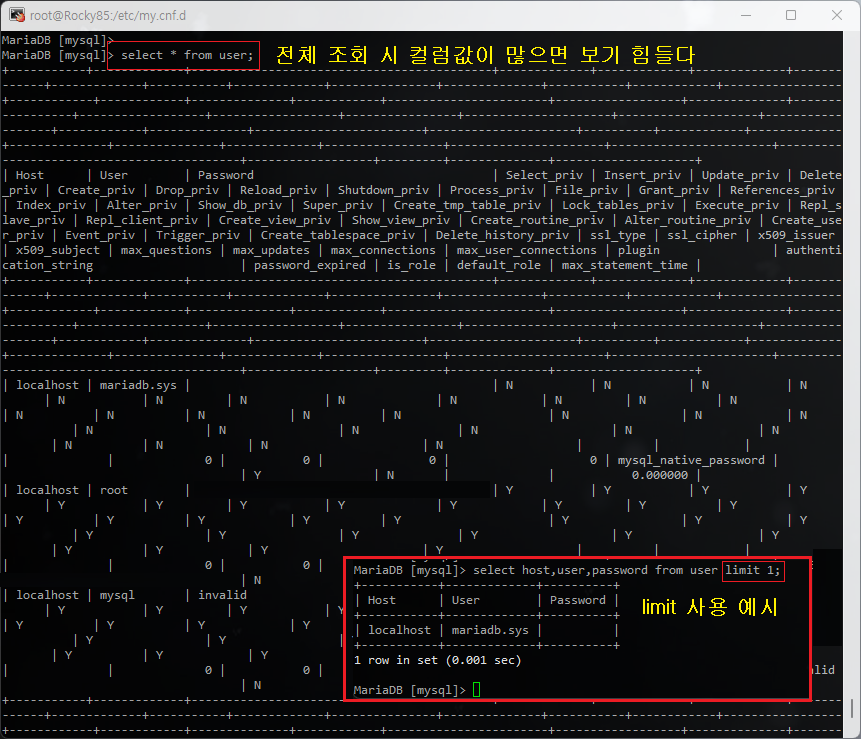
◇ 특정 테이블 데이터 확인[전체 및 특정 컬럼 값만 조회]
MariaDB [mysql]> select * from 테이블명; [전체 조회]
MariaDB [mysql]> select * from 테이블명 limit 숫자; [리스트가 많을 경우 상위 숫자만큼 결과 값 표시]
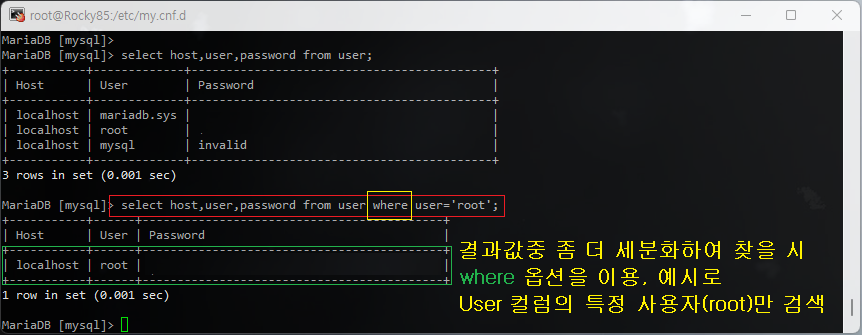
MariaDB [mysql]> select 칼럼, 칼럼명 from 테이블명; [쉼표(,)로 구분]

MariaDB [mysql]> select 컬럼, 컬럼명 from 테이블명 where 특정컬럼='root';
※ where 이용한 특정 칼럼 조회 시 양쪽 따옴표(' ') 포함시켜 주시기 바랍니다. 아니면 이런 식으로
ERROR 1054 (42S22): Unknown column 'root' in 'where clause, 에러가 발생합니다.
그 외에도 데이터 값을 삽입(Insert), 수정(Update), 삭제(Delete) 여러 가지 쿼리문이 있으나, 앞서 기초를 통해 먼저 데이터베이스 자체의 구조를 DB생성(Create), DB삭제(Drop), 확인(Show), 선택(Select)하는 방법에 먼저 익숙해지는 게 좋습니다. 물론 클라이언트 프로그램을 이용하면 쉽게 확인할 수 있겠지만, 운영을 하다 보면 서버에서 직접 확인을 해야 하는 경우가 발생할 수 있기 때문에 알아두면 좋습니다. 저도 최근 프로그램에 익숙해지다 보니, 순간 당황하면 기본적인 명령어를 까먹는 경우가 발생을 하네요. 리마인드 차원에서 복습을 하기 위해 포스팅을 하였습니다. 이후에 대한 내용은 준비 중이니 기다려 주시면 감사하겠습니다.
'◈『DataBase』 > MariaDB(Mysql)' 카테고리의 다른 글
| MariaDB 기본 데이터 디렉토리(Datadir) 위치 변경 (7) | 2022.03.31 |
|---|---|
| MariaDB 인증(Authentication) 방식에 대한 변경 및 주의 사항 (2) | 2022.03.25 |
| MariaDB 백업/복구 및 자동백업(Crontab) (0) | 2022.03.10 |